
Step by Step Installation and Configuration of Web Logic Server 12c
Software
1. Download Weblogic Server from the following URL:
http://www.oracle.com/technology/software/products/middleware/htdocs/fmw_11_download.html
2. Review documentation to meet the basic hardware and software requirements:
http://download.oracle.com/docs/cd/E15523_01/doc.1111/e14142/toc.htm
Installation
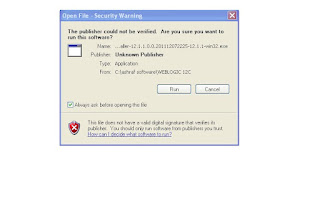
Invoke the installer ,click Run
Software
1. Download Weblogic Server from the following URL:
http://www.oracle.com/technology/software/products/middleware/htdocs/fmw_11_download.html
2. Review documentation to meet the basic hardware and software requirements:
http://download.oracle.com/docs/cd/E15523_01/doc.1111/e14142/toc.htm
Installation
Invoke the installer ,click Run

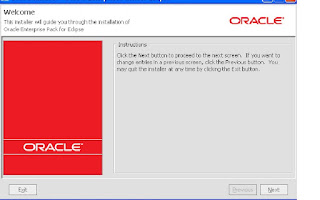
Click Next
3. Enter the location for Middle Ware Home and click “Next”
4. Register for Security Updates if you wish to and click “Next”
5. Choose Install Type, I’ve chosen “Custom” and click “Next”
6. Choose “Products and Components” you wish to use and click “Next”
7. If you have previous JDK/JRockit SDK, you can choose to browse the path, although Oracle recommends that you download the latest JRockit SDK to use with WebLogic. You can download the latest JRockit from:http://www.oracle.com/technology/products/jrockit/index.html
This screen displays a list of JDKs. This list differs depending on the specific installer you are using. For example, .jar installers do not include SDKs. If you are upgrading from a previous version, the list contains JDKs that are available for (and common across) previous installations of all the selected WebLogic Server components.
Select the JDK or JDKs that you want to install with the product.
You can also browse for and select a local JDK (at least 1.6.0_05) installed on your machine.
This screen also displays the approximate installed size of the highlighted JDK, the total installed size of all the selected JDKs, and the total installed size of all the components.
8. Choose “Product Installation Directories” and click “Next”
9. Choose whether you want to install the Windows services indicated, specifically the Oracle WebLogic Server Node Manager service. Node Manager is used to monitor, start, and stop server instances in a WebLogic domain.
If you select Yes, enter the Node Manager Listen Port in the appropriate field. The default is 5556.
All Users Start menu folder
Select this option to provide all users registered on the machine with access to the installed software. However, only users with administrator privileges can create shortcuts in the All Users folder. Therefore, if a user without administrator privileges uses the Configuration Wizard to create WebLogic domains, Start menu shortcuts to the domains are not created. In this case, users can manually create shortcuts in their local Start menu folders, if desired. Press ALT+A on the keyboard to select the All Users Start Menu.
Local User's Start menu folder
Selecting this option ensures that other users registered on this machine do not have access to the Start menu entries for this installation. Press ALT+L on the keyboard to select the Local User's start menu.
11. Review the Installation Summary and click “Next”
Configuration
1. Now in the configuration wizard, we’ll choose “Create New WebLogic Domain” and click “Next”
2. Choose the defaults, I’ve also chosen “WebLogic Advanced Web Services Extension” from the following screen, click “Next” to proceed
Now enter the Domain Name and Enter the Domain Location, click “Next” to proceed
Configure the WebLogic Administrator and Password, click “Next” to proceed
5. As this is a basic install and for development purposes, I will choose the “Domain Startup Mode” as “Development. Careful consideration should be taken for production deployment. Click “Next” to proceed
6. Select the Optional Configuration , I’ve selected the following options(we can configure JMS at a later stage):
Configure the Admin Server :
8. Configure the Managed servers and click “Next”
9. Next screen asks you if you wish to configure cluster, I did not configure any cluster. Click “Next” to proceed.
10. Next Screen is Configure Machines, I’ve not configured any. Click ” Next” to proceed
11. Review the Configuration Summary and click “Create”
12. Start the Admin server Click “Done” to finish and close the quickstart screen.
13. Now that we have installed and configured the WebLogic server, lets start the WebLogic server for the domain we configured. If Admin server is not started during the installation ,the startup scripts are placed in the user_projects directory for the domain we configured.
D:\oracle\product\weblogic12c\user_projects\domains\base_domain
Startweblogic.cmd
14. Now that the WebLogic Server is started lets login to the console
1. In to order login to the console open the web browser , the URL will be of the following format:
http://.:7001/console
In my case it will be
http://ashraf-oracle:7004/console/
The user name is “weblogic” and the password is what you configured during the configuration.
You will be presented with a neat front page, navigate to check the state of services on the left panel, follow the screenshot:

3. Enter the location for Middle Ware Home and click “Next”
4. Register for Security Updates if you wish to and click “Next”
5. Choose Install Type, I’ve chosen “Custom” and click “Next”
6. Choose “Products and Components” you wish to use and click “Next”
7. If you have previous JDK/JRockit SDK, you can choose to browse the path, although Oracle recommends that you download the latest JRockit SDK to use with WebLogic. You can download the latest JRockit from:http://www.oracle.com/technology/products/jrockit/index.html
This screen displays a list of JDKs. This list differs depending on the specific installer you are using. For example, .jar installers do not include SDKs. If you are upgrading from a previous version, the list contains JDKs that are available for (and common across) previous installations of all the selected WebLogic Server components.
Select the JDK or JDKs that you want to install with the product.
You can also browse for and select a local JDK (at least 1.6.0_05) installed on your machine.
This screen also displays the approximate installed size of the highlighted JDK, the total installed size of all the selected JDKs, and the total installed size of all the components.
8. Choose “Product Installation Directories” and click “Next”
9. Choose whether you want to install the Windows services indicated, specifically the Oracle WebLogic Server Node Manager service. Node Manager is used to monitor, start, and stop server instances in a WebLogic domain.
If you select Yes, enter the Node Manager Listen Port in the appropriate field. The default is 5556.
All Users Start menu folder
Select this option to provide all users registered on the machine with access to the installed software. However, only users with administrator privileges can create shortcuts in the All Users folder. Therefore, if a user without administrator privileges uses the Configuration Wizard to create WebLogic domains, Start menu shortcuts to the domains are not created. In this case, users can manually create shortcuts in their local Start menu folders, if desired. Press ALT+A on the keyboard to select the All Users Start Menu.
Local User's Start menu folder
Selecting this option ensures that other users registered on this machine do not have access to the Start menu entries for this installation. Press ALT+L on the keyboard to select the Local User's start menu.
11. Review the Installation Summary and click “Next”
Configuration
1. Now in the configuration wizard, we’ll choose “Create New WebLogic Domain” and click “Next”
2. Choose the defaults, I’ve also chosen “WebLogic Advanced Web Services Extension” from the following screen, click “Next” to proceed
Now enter the Domain Name and Enter the Domain Location, click “Next” to proceed
Configure the WebLogic Administrator and Password, click “Next” to proceed
5. As this is a basic install and for development purposes, I will choose the “Domain Startup Mode” as “Development. Careful consideration should be taken for production deployment. Click “Next” to proceed
6. Select the Optional Configuration , I’ve selected the following options(we can configure JMS at a later stage):
Configure the Admin Server :
8. Configure the Managed servers and click “Next”
9. Next screen asks you if you wish to configure cluster, I did not configure any cluster. Click “Next” to proceed.
10. Next Screen is Configure Machines, I’ve not configured any. Click ” Next” to proceed
11. Review the Configuration Summary and click “Create”
12. Start the Admin server Click “Done” to finish and close the quickstart screen.
13. Now that we have installed and configured the WebLogic server, lets start the WebLogic server for the domain we configured. If Admin server is not started during the installation ,the startup scripts are placed in the user_projects directory for the domain we configured.
D:\oracle\product\weblogic12c\user_projects\domains\base_domain
Startweblogic.cmd
14. Now that the WebLogic Server is started lets login to the console
1. In to order login to the console open the web browser , the URL will be of the following format:
http://
In my case it will be
http://ashraf-oracle:7004/console/
The user name is “weblogic” and the password is what you configured during the configuration.
You will be presented with a neat front page, navigate to check the state of services on the left panel, follow the screenshot:
No comments:
Post a Comment