To find the number of CPU ,execute the below command
cat /proc/cpuinfo
Last command:
NAMElast, lastb - show listing of last logged in users
SYNOPSISlast [-R] [-num] [ -n num ] [-adiox] [ -f file ] [ -t YYYYMMDDHHMMSS ] [name...] [tty...] lastb [-R] [-num] [ -n num ] [ -f file ] [ -t YYYYMMDDHHMMSS ] [-adiox] [name...] [tty...]
DESCRIPTIONLast searches back through the file /var/log/wtmp (or the file designated by the -f flag) and displays a list of all users logged in (and out) since that file was created. Names of users and tty's can be given, in which case last will show only those entries matching the arguments. Names of ttys can be abbreviated, thus last 0 is the same as last tty0.
When last catches a SIGINT signal (generated by the interrupt key, usually control-C) or a SIGQUIT signal (generated by the quit key, usually control-\), last will show how far it has searched through the file; in the case of the SIGINT signal last will then terminate.
The pseudo user reboot logs in each time the system is rebooted. Thus last reboot will show a log of all reboots since the log file was created.
Lastb is the same as last, except that by default it shows a log of the file /var/log/btmp, which contains all the bad login attempts.
OPTIONS
-num
This is a count telling last how many lines to show.
-n num
The same.
-t YYYYMMDDHHMMSS
Display the state of logins as of the specified time. This is useful, e.g., to determine easily who was logged in at a particular time -- specify that time with -t and look for "still logged in".
-R
Suppresses the display of the hostname field.
-a
Display the hostname in the last column. Useful in combination with the next flag.
-d
For non-local logins, Linux stores not only the host name of the remote host but its IP number as well. This option translates the IP number back into a hostname.
-i
This option is like -d in that it displays the IP number of the remote host, but it displays the IP number in numbers-and-dots notation.
-o
Read an old-type wtmp file (written by linux-libc5 applications).
-x
Display the system shutdown entries and run level changes.
Thursday, December 22, 2011
Wednesday, December 14, 2011
Step by Step Installation and Configuration of Web Logic 12c

Step by Step Installation and Configuration of Web Logic Server 12c
Software
1. Download Weblogic Server from the following URL:
http://www.oracle.com/technology/software/products/middleware/htdocs/fmw_11_download.html
2. Review documentation to meet the basic hardware and software requirements:
http://download.oracle.com/docs/cd/E15523_01/doc.1111/e14142/toc.htm
Installation
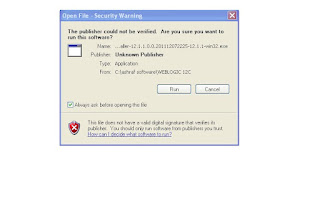
Invoke the installer ,click Run
Software
1. Download Weblogic Server from the following URL:
http://www.oracle.com/technology/software/products/middleware/htdocs/fmw_11_download.html
2. Review documentation to meet the basic hardware and software requirements:
http://download.oracle.com/docs/cd/E15523_01/doc.1111/e14142/toc.htm
Installation
Invoke the installer ,click Run

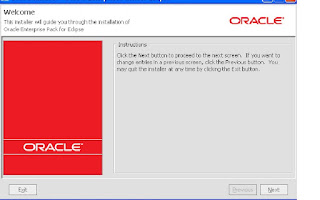
Click Next
3. Enter the location for Middle Ware Home and click “Next”
4. Register for Security Updates if you wish to and click “Next”
5. Choose Install Type, I’ve chosen “Custom” and click “Next”
6. Choose “Products and Components” you wish to use and click “Next”
7. If you have previous JDK/JRockit SDK, you can choose to browse the path, although Oracle recommends that you download the latest JRockit SDK to use with WebLogic. You can download the latest JRockit from:http://www.oracle.com/technology/products/jrockit/index.html
This screen displays a list of JDKs. This list differs depending on the specific installer you are using. For example, .jar installers do not include SDKs. If you are upgrading from a previous version, the list contains JDKs that are available for (and common across) previous installations of all the selected WebLogic Server components.
Select the JDK or JDKs that you want to install with the product.
You can also browse for and select a local JDK (at least 1.6.0_05) installed on your machine.
This screen also displays the approximate installed size of the highlighted JDK, the total installed size of all the selected JDKs, and the total installed size of all the components.
8. Choose “Product Installation Directories” and click “Next”
9. Choose whether you want to install the Windows services indicated, specifically the Oracle WebLogic Server Node Manager service. Node Manager is used to monitor, start, and stop server instances in a WebLogic domain.
If you select Yes, enter the Node Manager Listen Port in the appropriate field. The default is 5556.
All Users Start menu folder
Select this option to provide all users registered on the machine with access to the installed software. However, only users with administrator privileges can create shortcuts in the All Users folder. Therefore, if a user without administrator privileges uses the Configuration Wizard to create WebLogic domains, Start menu shortcuts to the domains are not created. In this case, users can manually create shortcuts in their local Start menu folders, if desired. Press ALT+A on the keyboard to select the All Users Start Menu.
Local User's Start menu folder
Selecting this option ensures that other users registered on this machine do not have access to the Start menu entries for this installation. Press ALT+L on the keyboard to select the Local User's start menu.
11. Review the Installation Summary and click “Next”
Configuration
1. Now in the configuration wizard, we’ll choose “Create New WebLogic Domain” and click “Next”
2. Choose the defaults, I’ve also chosen “WebLogic Advanced Web Services Extension” from the following screen, click “Next” to proceed
Now enter the Domain Name and Enter the Domain Location, click “Next” to proceed
Configure the WebLogic Administrator and Password, click “Next” to proceed
5. As this is a basic install and for development purposes, I will choose the “Domain Startup Mode” as “Development. Careful consideration should be taken for production deployment. Click “Next” to proceed
6. Select the Optional Configuration , I’ve selected the following options(we can configure JMS at a later stage):
Configure the Admin Server :
8. Configure the Managed servers and click “Next”
9. Next screen asks you if you wish to configure cluster, I did not configure any cluster. Click “Next” to proceed.
10. Next Screen is Configure Machines, I’ve not configured any. Click ” Next” to proceed
11. Review the Configuration Summary and click “Create”
12. Start the Admin server Click “Done” to finish and close the quickstart screen.
13. Now that we have installed and configured the WebLogic server, lets start the WebLogic server for the domain we configured. If Admin server is not started during the installation ,the startup scripts are placed in the user_projects directory for the domain we configured.
D:\oracle\product\weblogic12c\user_projects\domains\base_domain
Startweblogic.cmd
14. Now that the WebLogic Server is started lets login to the console
1. In to order login to the console open the web browser , the URL will be of the following format:
http://.:7001/console
In my case it will be
http://ashraf-oracle:7004/console/
The user name is “weblogic” and the password is what you configured during the configuration.
You will be presented with a neat front page, navigate to check the state of services on the left panel, follow the screenshot:

3. Enter the location for Middle Ware Home and click “Next”
4. Register for Security Updates if you wish to and click “Next”
5. Choose Install Type, I’ve chosen “Custom” and click “Next”
6. Choose “Products and Components” you wish to use and click “Next”
7. If you have previous JDK/JRockit SDK, you can choose to browse the path, although Oracle recommends that you download the latest JRockit SDK to use with WebLogic. You can download the latest JRockit from:http://www.oracle.com/technology/products/jrockit/index.html
This screen displays a list of JDKs. This list differs depending on the specific installer you are using. For example, .jar installers do not include SDKs. If you are upgrading from a previous version, the list contains JDKs that are available for (and common across) previous installations of all the selected WebLogic Server components.
Select the JDK or JDKs that you want to install with the product.
You can also browse for and select a local JDK (at least 1.6.0_05) installed on your machine.
This screen also displays the approximate installed size of the highlighted JDK, the total installed size of all the selected JDKs, and the total installed size of all the components.
8. Choose “Product Installation Directories” and click “Next”
9. Choose whether you want to install the Windows services indicated, specifically the Oracle WebLogic Server Node Manager service. Node Manager is used to monitor, start, and stop server instances in a WebLogic domain.
If you select Yes, enter the Node Manager Listen Port in the appropriate field. The default is 5556.
All Users Start menu folder
Select this option to provide all users registered on the machine with access to the installed software. However, only users with administrator privileges can create shortcuts in the All Users folder. Therefore, if a user without administrator privileges uses the Configuration Wizard to create WebLogic domains, Start menu shortcuts to the domains are not created. In this case, users can manually create shortcuts in their local Start menu folders, if desired. Press ALT+A on the keyboard to select the All Users Start Menu.
Local User's Start menu folder
Selecting this option ensures that other users registered on this machine do not have access to the Start menu entries for this installation. Press ALT+L on the keyboard to select the Local User's start menu.
11. Review the Installation Summary and click “Next”
Configuration
1. Now in the configuration wizard, we’ll choose “Create New WebLogic Domain” and click “Next”
2. Choose the defaults, I’ve also chosen “WebLogic Advanced Web Services Extension” from the following screen, click “Next” to proceed
Now enter the Domain Name and Enter the Domain Location, click “Next” to proceed
Configure the WebLogic Administrator and Password, click “Next” to proceed
5. As this is a basic install and for development purposes, I will choose the “Domain Startup Mode” as “Development. Careful consideration should be taken for production deployment. Click “Next” to proceed
6. Select the Optional Configuration , I’ve selected the following options(we can configure JMS at a later stage):
Configure the Admin Server :
8. Configure the Managed servers and click “Next”
9. Next screen asks you if you wish to configure cluster, I did not configure any cluster. Click “Next” to proceed.
10. Next Screen is Configure Machines, I’ve not configured any. Click ” Next” to proceed
11. Review the Configuration Summary and click “Create”
12. Start the Admin server Click “Done” to finish and close the quickstart screen.
13. Now that we have installed and configured the WebLogic server, lets start the WebLogic server for the domain we configured. If Admin server is not started during the installation ,the startup scripts are placed in the user_projects directory for the domain we configured.
D:\oracle\product\weblogic12c\user_projects\domains\base_domain
Startweblogic.cmd
14. Now that the WebLogic Server is started lets login to the console
1. In to order login to the console open the web browser , the URL will be of the following format:
http://
In my case it will be
http://ashraf-oracle:7004/console/
The user name is “weblogic” and the password is what you configured during the configuration.
You will be presented with a neat front page, navigate to check the state of services on the left panel, follow the screenshot:
Friday, December 9, 2011
net share


NET SHARE commandNET SHARE is used to manage shared resources. NET SHARE creates, deletes, modifies, or displays shared resources. This command is used to make a resource available to clients.
This command needs to be run as root or an account that has the proper privileges to share resources, so to avoid any complications, it is best to use the Administrator account.
How to quickly view all shared folder on my computer?
You can use the NET SHARE command without parameters to get this information. When using the NET SHARE command without parameters, NET SHARE displays information about all of the resources that are shared on the local computer.
Go to the Start menu, click Run, type cmd, and hit ENTER. Then type NET SHARE, and you will get a screen similar to the following:
Executing the NET SHARE command without parameters gives you a listing of all the folders that are shared on your computer.
Shared resource names that end in a $ character do not appear when you browse the local computer from a remote computer. If you want to access this folder from the remote computer, you have to type an exact path into your Explorer on the computer from which you connect to the shared folder.
How do I get detailed information about a shared local folder?
If you need detailed information about a particular shared folder, execute the NET SHARE folder with the name of the shared device, for example NET SHARE C$. You will get an output of the NET SHARE command similar to the following:
These parameters, such as the maximum number of users who can simultaneously access the shared resource, can be modified by the NET SHARE command too. See the explanation of parameters for the NET SHARE command below.
How do I share a folder?
To create a new local file share, use the following NET SHARE command:
NET SHARE sharename=drive:path /REMARK:"My shared folder" [/CACHE:Manual Automatic No ]
This is what it would look like in the real world:
NET SHARE MySharedFolder=c:\Documents /REMARK:"Docs on server XYZ"
Eg:
By executing this command, you would make the Documents folder on the C drive available for others in the network.
How do I limit how many users can access my shared folder?
To limit the number of users who can connect to a shared folder, you would use the following NET SHARE command:
NET SHARE sharename /USERS:number /REMARK:"Shared folder with limited number of users"
To remove any limit on the number of users who can connect to a shared folder, use the following:
NET SHARE sharename /UNLIMITED /REMARK:"Folder with unlimited access"
This will allow unlimited number of users to connect to the shared resource.
How do I remove sharing from a folder?
You can accomplish this using the following NET SHARE command again. If you want to delete a share, then execute the following:
NET SHARE {sharename devicename drive:path} /DELETE
To delete all shares that apply to a given device, you would use the following:
NET SHARE devicename /DELETE
Eg:
In this case the devicename can be a printer (Lpt1) or a pathname (for example C:\MySharedFolder\).
Possible problems with NET SHARE syntax
In case your folder or server name contains a space, you need to enclose the drive and the path of the directory in quotation marks (for example, "C:\MySharedFolder"). Not providing quotation marks results in an error message: System error 85 has occurred.
System errors related to NET SHARE
When using the NET SHARE command, you can run into some syntax-related errors. The System error 67 occurred is a very common one. See here for more details: System error 67 has occurred.
Are there other related useful networking commands?
The NET SHARE command is used at the server to share a folder to others. If you want to access this shared resource from a client, you would use the NET USE command.
This page provides an overview of all available networking server commands: server NET commands.
NET SHARE syntax
net share [ShareName]
net share [ShareName=Drive:Path
[{/users:Number /unlimited}]
[/remark:"Text"]
[/cache: {manual automatic no}]
]
net share [ShareName
[{/users:Number unlimited}]
[/remark:"Text"]
[/cache: {manual automatic no}]
]
net share [{ShareName Drive:Path} /delete]
What are the parameters?
ShareName
Specifies the name of the shared resource as it should display on the network.
Drive:Path
Defines the absolute path of the directory to be shared.
/remark:"Text"
Adds a description about the resource. Do not forget to enclose it in quotation marks.
/users:Number
Used to set the maximum number of users who can simultaneously access the shared resource.
/unlimited
This setting specifies an unlimited number of users who can simultaneously access the shared resource.
/cache:manual
Enables offline client caching with manual reintegration.
/cache:automatic
Enables offline client caching with automatic reintegration.
/cache:documents
Enables automatic caching of documents from this share.
/cache:programs
Enables automatic caching of documents and programs.
/cache:no
Disables caching.
/delete
Stops sharing the shared resource.
net helpCommand
Displays Help for the specified net command.
Sunday, December 4, 2011
WebLogic 12c
On December 1 ORACLE , unveils the next generation of the industry’s #1 application server and cornerstone of Oracle’s cloud application foundation—Oracle WebLogic Server 12c.
The WebLogic 12c release comes as the Java 7 language specification begins to take hold and as cloud deployments continues to rise.
"The Cloud application foundation is the underlying application infrastructure for all of our Fusion middleware, and WebLogic12c is the cornerstone of that infrastructure,"
One of the biggest new features in WebLogic 12c is full support for JavaEE 6.Oracle has been adding some JavaEE 6 APIs to minor WebLogic 11g updates to provide some incremental features.
"12c has the full complement of JavaEE 6, including RESTful Web Services, lightweight Web Services with EJB and the most desired feature which is context and dependency injection," .
Lehmann noted that customers have been waiting for JavaEE 6, since it significantly reduces the amount of code and Java classes that previously necessitated the use of third party frameworks. He added that WebLogic customers can leverage JavaEE 6 now as a lightweight development framework and programming model.
Support is also included for Java SE 7, which was officially launched in July. Java SE 7 provides better mutli-core processor support with the fork/join framework, and it includes improvements to the Java Virtual Machine (JVM) for multi-language support.
The focus on developers and efficiency is also reflected in the size of the WebLogic 12c server itself. Lehmann said that the developer download size for WebLogic 12c is only 168 MB, which is a sixfold size decrease compared to the previous release.
From a scalability perspective, Oracle is baking in a higher level of abstraction for cloud deployments. Lehmann explained that the Oracle Virtual Assembly Builder component gathers up multiple virtual machines into a unit known as an "assembly." He added that when virtual machines are treated as a unit it provides the abstraction necessary to properly manage a cloud deployment.
The Oracle Traffic Director component expands on the delivery capabilities that previous generations of WebLogic have included. Lehmann noted that in the WebLogic 11g release, Oracle bundled in the Coherence caching server. With the new WebLogic 12c release, there is a new software load balancer called the Oracle Traffic Director.
"What we've done with the Oracle Traffic Director is we've put a software load balancer for traffic routing, shaping and capacity management on the Exalogic system for the WebLogic server," Lehmann said. "When a WebLogic 12c deployment grows or shrinks, the system automatically adjusts the network traffic for the environment to gracefully bring on or reduce load."
The Exalogic Elastic Cloud is an engineered system from Oracle that debuted at the end of 2010. The Exalogic is purpose-built engineered system for Java and Oracle middleware applications. Lehmann stressed that while WebLogic 12c is highly optimized when running on Exalogic, it will also run across other x86 systems.
"As you move from conventional systems to an engineered system like Exalogic we do further performance optimizations and integration," Lehmann said. "For a conventional server this is a standard web tier that is included with WebLogic, when you go to Exalogic you get Oracle Traffic Director."
The WebLogic 12c release is also the first WebLogic release since Oracle acquired Sun, which has its own Java middleware server with the open source GlassFish project that Oracle still supports and develops. Lehmann explained that applications on GlassFish can be easily redeployed to WebLogic 12c, to get the benefit of additional enterprise and cloud scale features. Those additional features include support for Oracle RAC (Real Application Clusters), virtualization support, Oracle Traffic Director and the Coherence integration among other capabilities.
"GlassFish is a fantastic development environment and now with WebLogic 12c and its support for JavaEE 6 and Java SE 7, WebLogic is also a great development environment," Lehmann said. "Another point of differentiation is that Fusion middleware and applications are certified on WebLogic; they are not certified or support on GlassFish."
GlassFish is all about helping to drive the JavaEE specification forward, although it is also its own product that has Oracle commercial support.
"Generally for more robust and higher-end deployment, people will generally look to WebLogic," Lehmann said.
Monday, November 28, 2011
OS block size for Linux and Windows
Determine OS block size for Linux and Windows
A block is a uniformly sized unit of data storage for a filesystem. Block size can be an important consideration when setting up a system that is designed for maximum performance.
Block size in Linux : If we want to confirm the block size of any filesystem of Ubuntu or any other Linux OS, tune2fs command is here to help:
ubuntu# tune2fs -l /dev/sda1 | grep Block
Block count: 4980736
Block size: 4096
Blocks per group: 32768
From this example, we can see that the default block size for the filesystem on /dev/sda1 partition is 4096 bytes, or 4k. That's the default block size for ext3 filesystem.
OS block size in Solaris :
$perl -e '$a=(stat ".")[11]; print $a'
8192
or
$df -g | grep 'block size'
Block size in Window Machine : If OS is using ntfs system use the below command :
C:\>fsutil fsinfo ntfsinfo D:
NTFS Volume Serial Number : 0x7a141d52141d12ad
Version : 3.1
Number Sectors : 0x00000000036b17d0
Total Clusters : 0x00000000006d62fa
Free Clusters : 0x00000000001ed190
Total Reserved : 0x0000000000000170
Bytes Per Sector : 512
Bytes Per Cluster : 4096 <<=== (block size)
Bytes Per FileRecord Segment : 1024
Clusters Per FileRecord Segment : 0
Mft Valid Data Length : 0x0000000005b64000
Mft Start Lcn : 0x00000000000c0000
Mft2 Start Lcn : 0x000000000036b17d
Mft Zone Start : 0x000000000043c9c0
Mft Zone End : 0x000000000044b460
Tuesday, November 22, 2011
nslookup
Nslookup.exe is a command-line administrative tool for testing and troubleshooting DNS servers. This tool is installed along with the TCP/IP protocol through Control Panel. This article includes several tips for using Nslookup.exe.
MORE INFORMATIONTo use Nslookup.exe, please note the following: The TCP/IP protocol must be inst...To use Nslookup.exe, please note the following:
•The TCP/IP protocol must be installed on the computer running Nslookup.exe
•At least one DNS server must be specified when you run the IPCONFIG /ALL command from a command prompt.
•Nslookup will always devolve the name from the current context. If you fail to fully qualify a name query (that is, use trailing dot), the query will be appended to the current context. For example, the current DNS settings are att.com and a query is performed on www.microsoft.com; the first query will go out as www.microsoft.com.att.com because of the query being unqualified. This behavior may be inconsistent with other vendor's versions of Nslookup, and this article is presented to clarify the behavior of Microsoft Windows NT Nslookup.exe
•If you have implemented the use of the search list in the Domain Suffix Search Order defined on the DNS tab of the Microsoft TCP/IP Properties page, devolution will not occur. The query will be appended to the domain suffixes specified in the list. To avoid using the search list, always use a Fully Qualified Domain Name (that is, add the trailing dot to the name).
Nslookup.exe can be run in two modes: interactive and noninteractive. Noninteractive mode is useful when only a single piece of data needs to be returned. The syntax for noninteractive mode is:
nslookup [-option] [hostname] [server]
To start Nslookup.exe in interactive mode, simply type "nslookup" at the command prompt:
C:\> nslookup
Default Server: nameserver1.domain.com
Address: 10.0.0.1
>
Typing "help" or "?" at the command prompt will generate a list of available commands. Anything typed at the command prompt that is not recognized as a valid command is assumed to be a host name and an attempt is made to resolve it using the default server. To interrupt interactive commands, press CTRL+C. To exit interactive mode and return to the command prompt, type exit at the command prompt.
The following is the help output and contains the complete list of options:
Commands: (identifiers are shown in uppercase, [] means optional)
NAME - print info about the host/domain NAME using default
server
NAME1 NAME2 - as above, but use NAME2 as server
help or ? - print info on common commands
set OPTION - set an option
all - print options, current server and host
[no]debug - print debugging information
[no]d2 - print exhaustive debugging information
[no]defname - append domain name to each query
[no]recurse - ask for recursive answer to query
[no]search - use domain search list
[no]vc - always use a virtual circuit
domain=NAME - set default domain name to NAME
srchlist=N1[/N2/.../N6] - set domain to N1 and search list to N1, N2,
and so on
root=NAME - set root server to NAME
retry=X - set number of retries to X
timeout=X - set initial time-out interval to X seconds
type=X - set query type (for example, A, ANY, CNAME, MX,
NS, PTR, SOA, SRV)
querytype=X - same as type
class=X - set query class (for example, IN (Internet), ANY)
[no]msxfr - use MS fast zone transfer
ixfrver=X - current version to use in IXFR transfer request
server NAME - set default server to NAME, using current default server
lserver NAME - set default server to NAME, using initial server
finger [USER] - finger the optional NAME at the current default host
root - set current default server to the root
ls [opt] DOMAIN [> FILE] - list addresses in DOMAIN (optional: output to
FILE)
-a - list canonical names and aliases
-d - list all records
-t TYPE - list records of the given type (for example, A, CNAME,
MX, NS, PTR, and so on)
view FILE - sort an 'ls' output file and view it with pg
exit - exit the program
A number of different options can be set in Nslookup.exe by running the set command at the command prompt. A complete listing of these options is obtained by typing set all. See above, under the set command for a printout of the available options.
Looking up Different Data Types
To look up different data types within the domain name space, use the set type or set q[uerytype] command at the command prompt. For example, to query for the mail exchanger data, type the following:
C:\> nslookup
Default Server: ns1.domain.com
Address: 10.0.0.1
> set q=mx
> mailhost
Server: ns1.domain.com
Address: 10.0.0.1
mailhost.domain.com MX preference = 0, mail exchanger =
mailhost.domain.com
mailhost.domain.com internet address = 10.0.0.5
>
The first time a query is made for a remote name, the answer is authoritative, but subsequent queries are nonauthoritative. The first time a remote host is queried, the local DNS server contacts the DNS server that is authoritative for that domain. The local DNS server will then cache that information, so that subsequent queries are answered nonauthoritatively out of the local server's cache.
Querying Directly from Another Name Server
To query another name server directly, use the server or lserver commands to switch to that name server. The lserver command uses the local server to get the address of the server to switch to, while the server command uses the current default server to get the address.
Example:
C:\> nslookup
Default Server: nameserver1.domain.com
Address: 10.0.0.1
> server 10.0.0.2
Default Server: nameserver2.domain.com
Address: 10.0.0.2
>
Using Nslookup.exe to Transfer Entire Zone
Nslookup can be used to transfer an entire zone by using the ls command. This is useful to see all the hosts within a remote domain. The syntax for the ls command is:
ls [- a | d | t type] domain [> filename]
Using ls with no arguments will return a list of all address and name server data. The -a switch will return alias and canonical names, -d will return all data, and -t will filter by type.
Example:
>ls domain.com
[nameserver1.domain.com]
nameserver1.domain.com. NS server = ns1.domain.com
nameserver2.domain.com NS server = ns2.domain.com
nameserver1 A 10.0.0.1
nameserver2 A 10.0.0.2
>
Zone transfers can be blocked at the DNS server so that only authorized addresses or networks can perform this function. The following error will be returned if zone security has been set:
*** Can't list domain example.com.: Query refused
For additional information, see the following article or articles in the Microsoft Knowledge Base:
193837 (http://support.microsoft.com/kb/193837/EN-US/ ) Windows NT 4.0 DNS Server Default Zone Security Settings
Back to the top
Troubleshooting Nslookup.exe
Default Server Timed Out
When starting the Nslookup.exe utility, the following errors may occur:
*** Can't find server name for address w.x.y.z: Timed out
NOTE: w.x.y.z is the first DNS server listed in the DNS Service Search Order list.
*** Can't find server name for address 127.0.0.1: Timed out
The first error indicates that the DNS server cannot be reached or the service is not running on that computer. To correct this problem, either start the DNS service on that server or check for possible connectivity problems.
The second error indicates that no servers have been defined in the DNS Service Search Order list. To correct this problem, add the IP address of a valid DNS server to this list.
For additional information, see the following article or articles in the Microsoft Knowledge Base:
172060 (http://support.microsoft.com/kb/172060/EN-US/ ) NSLOOKUP: Can't Find Server Name for Address 127.0.0.1
Can't Find Server Name when Starting Nslookup.exe
When starting the Nslookup.exe utility, the following error may occur:
*** Can't find server name for address w.x.y.z: Non-existent domain
This error occurs when there is no PTR record for the name server's IP address. When Nslookup.exe starts, it does a reverse lookup to get the name of the default server. If no PTR data exists, this error message is returned. To correct make sure that a reverse lookup zone exists and contains PTR records for the name servers.
For additional information, see the following article or articles in the Microsoft Knowledge Base:
172953 (http://support.microsoft.com/kb/172953/EN-US/ ) How to Install and Configure Microsoft DNS Server
Nslookup on Child Domain Fails
When querying or doing a zone transfer on a child domain, Nslookup may return the following errors:
*** ns.domain.com can't find child.domain.com.: Non-existent domain *** Can't list domain child.domain.com.: Non-existent domain
In DNS Manager, a new domain can be added under the primary zone, thus creating a child domain. Creating a child domain this way does not create a separate db file for the domain, thus querying that domain or running a zone transfer on it will produce the above errors. Running a zone transfer on the parent domain will list data for both the parent and child domains. To work around this problem, create a new primary zone on the DNS server for the child domain.
Friday, November 18, 2011
Boot sequence summary
You may find that your server isn't actually booting to runlevel 3, maybe it's going to 5 (with graphical login)? who -r or runlevel should tell you the current runlevel, and grep initdefault /etc/inittab the boot-time default.
Boot sequence summary
1BIOS
2Master Boot Record (MBR)
3Kernel
4init
--------------------------------------------------------------------------------
BIOS
Load boot sector from one of:
•Floppy
•CDROM
•SCSI drive
•IDE drive
--------------------------------------------------------------------------------
Master Boot Record
•MBR (loaded from /dev/hda or /dev/sda) contains:
◦lilo
■load kernel (image=), or
■load partition boot sector (other=)
◦DOS
■load "bootable" partition boot sector (set with fdisk)
•partition boot sector (eg /dev/hda2) contains:
◦DOS
■loadlin
◦lilo
■kernel
--------------------------------------------------------------------------------
LILO
One minute guide to installing a new kernel
•edit /etc/lilo.conf
◦duplicate image= section, eg:
image=/bzImage-2.2.12
label=12
read-only
◦man lilo.conf for details
•run /sbin/lilo
•(copy modules)
•reboot to test
--------------------------------------------------------------------------------
Kernel
•initialise devices
•(optionally loads initrd, see below)
•mount root FS
◦specified by lilo or loadin
◦kernel prints:
■VFS: Mounted root (ext2 filesystem) readonly.
•run /sbin/init, PID 1
◦can be changed with boot=
◦init prints:
■INIT: version 2.76 booting
--------------------------------------------------------------------------------
initrd
Allows setup to be performed before root FS is mounted
•lilo or loadlin loads ram disk image
•kernel runs /linuxrc
◦load modules
◦initialise devices
◦/linuxrc exits
•"real" root is mounted
•kernel runs /sbin/init
Details in /usr/src/linux/Documentation/initrd.txt
--------------------------------------------------------------------------------
/sbin/init
•reads /etc/inittab
•runs script defined by this line:
◦si::sysinit:/etc/init.d/rcS
•switches to runlevel defined by
◦id:3:initdefault:
--------------------------------------------------------------------------------
sysinit
•debian: /etc/init.d/rcS which runs
◦/etc/rcS.d/S* scripts
■symlinks to /etc/init.d/*
◦/etc/rc.boot/* (depreciated)
•redhat: /etc/rc.d/rc.sysinit script which
◦load modules
◦check root FS and mount RW
◦mount local FS
◦setup network
◦mount remote FS
--------------------------------------------------------------------------------
Example Debian /etc/rcS.d/ directory
README
S05keymaps-lct.sh -> ../init.d/keymaps-lct.sh
S10checkroot.sh -> ../init.d/checkroot.sh
S20modutils -> ../init.d/modutils
S30checkfs.sh -> ../init.d/checkfs.sh
S35devpts.sh -> ../init.d/devpts.sh
S35mountall.sh -> ../init.d/mountall.sh
S35umsdos -> ../init.d/umsdos
S40hostname.sh -> ../init.d/hostname.sh
S40network -> ../init.d/network
S41ipmasq -> ../init.d/ipmasq
S45mountnfs.sh -> ../init.d/mountnfs.sh
S48console-screen.sh -> ../init.d/console-screen.sh
S50hwclock.sh -> ../init.d/hwclock.sh
S55bootmisc.sh -> ../init.d/bootmisc.sh
S55urandom -> ../init.d/urandom
--------------------------------------------------------------------------------
Run Levels
•0 halt
•1 single user
•2-4 user defined
•5 X11
•6 Reboot
•Default in /etc/inittab, eg
◦id:3:initdefault:
•Change using /sbin/telinit
--------------------------------------------------------------------------------
Run Level programs
•Run programs for specified run level
•/etc/inittab lines:
◦1:2345:respawn:/sbin/getty 9600 tty1
■Always running in runlevels 2, 3, 4, or 5
■Displays login on console (tty1)
◦2:234:respawn:/sbin/getty 9600 tty2
■Always running in runlevels 2, 3, or 4
■Displays login on console (tty2)
◦l3:3:wait:/etc/init.d/rc 3
■Run once when switching to runlevel 3.
■Uses scripts stored in /etc/rc3.d/
◦ca:12345:ctrlaltdel:/sbin/shutdown -t1 -a -r now
■Run when control-alt-delete is pressed
--------------------------------------------------------------------------------
Typical /etc/rc3.d/ directory
When changing runlevels /etc/init.d/rc 3:
•Kills K##scripts
•Starts S##scripts
K25nfs-server -< ../init.d/nfs-server
K99xdm -< ../init.d/xdm
S10sysklogd -< ../init.d/sysklogd
S12kerneld -< ../init.d/kerneld
S15netstd_init -< ../init.d/netstd_init
S18netbase -< ../init.d/netbase
S20acct -< ../init.d/acct
S20anacron -< ../init.d/anacron
S20gpm -< ../init.d/gpm
S20postfix -< ../init.d/postfix
S20ppp -< ../init.d/ppp
S20ssh -< ../init.d/ssh
S20xfs -< ../init.d/xfs
S20xfstt -< ../init.d/xfstt
S20xntp3 -< ../init.d/xntp3
S89atd -< ../init.d/atd
S89cron -< ../init.d/cron
S99rmnologin -< ../init.d/rmnologin
--------------------------------------------------------------------------------
Boot Summary
•lilo
◦/etc/lilo.conf
•debian runs
◦/etc/rcS.d/S* and /etc/rc.boot/
◦/etc/rc3.d/S* scripts
•redhat runs
◦/etc/rc.d/rc.sysinit
◦/etc/rc.d/rc3.d/S* scripts
Monday, November 14, 2011
command to find the process of the port
netstat -tupln |grep 40110
tcp 0 0 0.0.0.0:40110 0.0.0.0:* LISTEN 23347/httpd
ps -ef|grep httpd
tcp 0 0 0.0.0.0:40110 0.0.0.0:* LISTEN 23347/httpd
ps -ef|grep httpd
Sunday, November 13, 2011
History command with timestamp
History is a common command for shell to list out all the executed commands. It is very useful when it comes to investigation on what commands was executed that tear down the server. With the help of last command, you be able to track the login time of particular user as well as the the duration of the time he/she stays login.
last
...
mysurface tty7 :0 Mon Oct 6 20:07 - down (00:00)
reboot system boot 2.6.24.4-64.fc8 Mon Oct 6 20:06 (00:00)
mysurface pts/8 10.168.28.44 Mon Oct 6 17:42 - down (01:58)
mysurface pts/7 :0.0 Mon Oct 6 17:41 - 19:40 (01:59)
mysurface pts/6 :0.0 Mon Oct 6 17:27 - 19:40 (02:13)
mysurface pts/5 :0.0 Mon Oct 6 17:27 - 19:40 (02:13)
mysurface pts/5 :0.0 Mon Oct 6 15:52 - 15:59 (00:07)
...If the command line history could provides the date time of the commands being executed, that may really narrow down the scope of the user actions that cause the server malfunction. By default, history do not append with timestamp, but it is easy to configure it to display timestamp, you just need to set one environment variable HISTTIMEFORMAT.
HISTTIMEFORMAT takes format string of strftime. Check out the strftime manual to choose and construct the timestamp that suit your taste. My favorite is “%F %T “.
export HISTTIMEFORMAT="%F %T "Execute history again and you will see the effect on the spot, bare in mind that the timestamp for command lines that executed at previous sessions may not valid, as the time was not tracked.
...
994 2008-10-16 02:27:40 exit
995 2008-10-16 01:12:20 iptables -nL
996 2008-10-16 01:47:46 vi .bash_profile
997 2008-10-16 01:47:55 history
998 2008-10-16 01:48:03 . .bash_profile
999 2008-10-16 01:48:04 history
1000 2008-10-16 01:48:09 exit
1001 2008-10-16 02:27:43 history
...I would suggest you to put the export into ~/.bash_profile as well as /root/.bash_profile. In case you do not have .bash_profile, you can choose to put into ~/.bashrc.
Saturday, October 8, 2011
Not able to start Managed Server
Issue :
Managed Server not starting
weblogic.store.PersistentStoreExcept ion: [Store:280105]The persistent file store "_WLS_ManagedServer" cannot open file _WLS_MANAGEDSERVER000000.DAT.
weblogic.store.PersistentStoreException: [Store:280105]The persistent file store "_WLS_ManagedServer" cannot open file _WLS_MANAGEDSERVER000000.DAT.
Solution:
Remove the lock files from the below location .
cd $WL_HOME/user_projects/domains//servers//data/ldap/ldapfiles
$WL_HOME/user_projects/domains//servers//tmp/
$WL_HOME/user_projects/domains//servers//data/store/diagnostics
$WL_HOME/user_projects/domains//servers//data/store/default
Managed Server not starting
weblogic.store.PersistentStoreExcept ion: [Store:280105]The persistent file store "_WLS_ManagedServer" cannot open file _WLS_MANAGEDSERVER000000.DAT.
weblogic.store.PersistentStoreException: [Store:280105]The persistent file store "_WLS_ManagedServer" cannot open file _WLS_MANAGEDSERVER000000.DAT.
Solution:
Remove the lock files from the below location .
cd $WL_HOME/user_projects/domains/
$WL_HOME/user_projects/domains/
$WL_HOME/user_projects/domains/
$WL_HOME/user_projects/domains/
Monday, September 26, 2011
example using chkconfig
Redhat enterprise Linux comes with two nice commands
ntsysv - simple TUI (text based interface) interface for configuring runlevels.
chkconfig - chkconfig provides a simple command-line tool for maintaining the /etc/rc[0-6].d directory hierarchy by relieving system administrators of the task of directly manipulating the numerous symbolic links in those directories.
Turn on sshd service on boot
Code:
chkconfig sshd onTurn on MySQL service on boot
Code:
chkconfig mysqld onTurn on Apache / httpd service on boot
Code:
chkconfig httpd onTurn OFF Apache / httpd service on boot
Code:
chkconfig httpd offList if service is on of off on boot
Use --list option which lists all of the services which chkconfig knows about, and whether they are stopped or started in each runlevel:
Code:
/sbin/chkconfig --listSample O/p of above command
Code:
ipmi 0:off 1:off 2:off 3:off 4:off 5:off 6:off
rawdevices 0:off 1:off 2:off 3:on 4:on 5:on 6:off
NetworkManager 0:off 1:off 2:off 3:off 4:off 5:off 6:off
rpcidmapd 0:off 1:off 2:off 3:off 4:on 5:on 6:off
ntpd 0:off 1:off 2:on 3:on 4:on 5:on 6:off
readahead 0:off 1:off 2:off 3:off 4:off 5:on 6:off
cpuspeed 0:off 1:on 2:on 3:off 4:on 5:on 6:off
gpm 0:off 1:off 2:on 3:off 4:on 5:on 6:off
autofs 0:off 1:off 2:off 3:off 4:on 5:on 6:off
cups 0:off 1:off 2:on 3:off 4:on 5:on 6:off
lm_sensors 0:off 1:off 2:on 3:on 4:on 5:on 6:off
messagebus 0:off 1:off 2:off 3:on 4:on 5:on 6:off
network 0:off 1:off 2:on 3:on 4:on 5:on 6:off
xfs 0:off 1:off 2:on 3:off 4:on 5:on 6:off
saslauthd 0:off 1:off 2:off 3:on 4:on 5:on 6:off
apf 0:off 1:off 2:on 3:on 4:on 5:on 6:off
nscd 0:off 1:off 2:off 3:off 4:off 5:off 6:off
rhnsd 0:off 1:off 2:on 3:on 4:on 5:on 6:off
snmptrapd 0:off 1:off 2:off 3:off 4:off 5:off 6:off
xinetd 0:off 1:off 2:off 3:on 4:on 5:on 6:off
syslog 0:off 1:off 2:on 3:on 4:on 5:on 6:off
netplugd 0:off 1:off 2:off 3:off 4:off 5:off 6:off
portmap 0:off 1:off 2:off 3:off 4:on 5:on 6:off
isdn 0:off 1:off 2:on 3:off 4:on 5:on 6:off
microcode_ctl 0:off 1:off 2:on 3:on 4:on 5:on 6:off
ypbind 0:off 1:off 2:off 3:off 4:off 5:off 6:off
kudzu 0:off 1:off 2:off 3:on 4:on 5:on 6:off
iptables 0:off 1:off 2:off 3:off 4:off 5:off 6:off
postfix 0:off 1:off 2:on 3:on 4:on 5:on 6:off
bluetooth 0:off 1:off 2:off 3:off 4:off 5:off 6:off
sysstat 0:off 1:on 2:on 3:on 4:on 5:on 6:off
diskdump 0:off 1:off 2:off 3:off 4:off 5:off 6:off
winbind 0:off 1:off 2:off 3:off 4:off 5:off 6:off
dovecot 0:off 1:off 2:on 3:on 4:on 5:on 6:off
named 0:off 1:off 2:off 3:off 4:off 5:off 6:off
nfs 0:off 1:off 2:off 3:off 4:off 5:off 6:off
mysqld 0:off 1:off 2:off 3:on 4:off 5:off 6:off
sshd 0:off 1:off 2:on 3:on 4:on 5:on 6:off
auditd 0:off 1:off 2:off 3:off 4:off 5:off 6:off
vsftpd 0:off 1:off 2:off 3:off 4:off 5:off 6:off
openibd 0:off 1:off 2:on 3:off 4:on 5:on 6:off
irda 0:off 1:off 2:off 3:off 4:off 5:off 6:off
monit 0:off 1:off 2:on 3:on 4:on 5:on 6:off
dc_client 0:off 1:off 2:off 3:off 4:off 5:off 6:off
readahead_early 0:off 1:off 2:off 3:off 4:off 5:on 6:off
netfs 0:off 1:off 2:off 3:on 4:on 5:on 6:off
squid 0:off 1:off 2:off 3:off 4:off 5:off 6:off
vmware 0:off 1:off 2:on 3:on 4:off 5:on 6:off
haldaemon 0:off 1:off 2:off 3:on 4:on 5:on 6:off
httpd 0:off 1:off 2:off 3:off 4:off 5:off 6:off
netdump 0:off 1:off 2:off 3:off 4:off 5:off 6:off
irqbalance 0:off 1:off 2:off 3:on 4:on 5:on 6:off
smartd 0:off 1:off 2:on 3:on 4:on 5:on 6:off
snmpd 0:off 1:off 2:on 3:on 4:on 5:on 6:off
anacron 0:off 1:off 2:on 3:on 4:on 5:on 6:off
arptables_jf 0:off 1:off 2:on 3:on 4:on 5:on 6:off
nfslock 0:off 1:off 2:off 3:off 4:on 5:on 6:off
dc_server 0:off 1:off 2:off 3:off 4:off 5:off 6:off
crond 0:off 1:off 2:on 3:on 4:on 5:on 6:off
psacct 0:off 1:off 2:on 3:on 4:on 5:on 6:off
mdmpd 0:off 1:off 2:off 3:off 4:off 5:off 6:off
tux 0:off 1:off 2:off 3:off 4:off 5:off 6:off
atd 0:off 1:off 2:off 3:on 4:on 5:on 6:off
acpid 0:off 1:off 2:off 3:on 4:on 5:on 6:off
spamassassin 0:off 1:off 2:on 3:on 4:on 5:on 6:off
pcmcia 0:off 1:off 2:on 3:off 4:on 5:on 6:off
rpcgssd 0:off 1:off 2:off 3:off 4:on 5:on 6:off
mdmonitor 0:off 1:off 2:on 3:on 4:on 5:on 6:off
xinetd based services:
cups-lpd: off
finger: off
eklogin: off
klogin: off
chargen: off
daytime-udp: off
krb5-telnet: off
time-udp: off
daytime: off
time: off
gssftp: off
kshell: off
echo-udp: off
rsync: off
tftp: off
vmware-authd: on
chargen-udp: off
echo: offType ntsysv for GUI tool
Code:
ntsysvType serviceconf - GUI tools need X GUI system
Code:
serviceconfShare
Share this post on Digg
Del.icio.us
Technorati
Twitter
ntsysv - simple TUI (text based interface) interface for configuring runlevels.
chkconfig - chkconfig provides a simple command-line tool for maintaining the /etc/rc[0-6].d directory hierarchy by relieving system administrators of the task of directly manipulating the numerous symbolic links in those directories.
Turn on sshd service on boot
Code:
chkconfig sshd onTurn on MySQL service on boot
Code:
chkconfig mysqld onTurn on Apache / httpd service on boot
Code:
chkconfig httpd onTurn OFF Apache / httpd service on boot
Code:
chkconfig httpd offList if service is on of off on boot
Use --list option which lists all of the services which chkconfig knows about, and whether they are stopped or started in each runlevel:
Code:
/sbin/chkconfig --listSample O/p of above command
Code:
ipmi 0:off 1:off 2:off 3:off 4:off 5:off 6:off
rawdevices 0:off 1:off 2:off 3:on 4:on 5:on 6:off
NetworkManager 0:off 1:off 2:off 3:off 4:off 5:off 6:off
rpcidmapd 0:off 1:off 2:off 3:off 4:on 5:on 6:off
ntpd 0:off 1:off 2:on 3:on 4:on 5:on 6:off
readahead 0:off 1:off 2:off 3:off 4:off 5:on 6:off
cpuspeed 0:off 1:on 2:on 3:off 4:on 5:on 6:off
gpm 0:off 1:off 2:on 3:off 4:on 5:on 6:off
autofs 0:off 1:off 2:off 3:off 4:on 5:on 6:off
cups 0:off 1:off 2:on 3:off 4:on 5:on 6:off
lm_sensors 0:off 1:off 2:on 3:on 4:on 5:on 6:off
messagebus 0:off 1:off 2:off 3:on 4:on 5:on 6:off
network 0:off 1:off 2:on 3:on 4:on 5:on 6:off
xfs 0:off 1:off 2:on 3:off 4:on 5:on 6:off
saslauthd 0:off 1:off 2:off 3:on 4:on 5:on 6:off
apf 0:off 1:off 2:on 3:on 4:on 5:on 6:off
nscd 0:off 1:off 2:off 3:off 4:off 5:off 6:off
rhnsd 0:off 1:off 2:on 3:on 4:on 5:on 6:off
snmptrapd 0:off 1:off 2:off 3:off 4:off 5:off 6:off
xinetd 0:off 1:off 2:off 3:on 4:on 5:on 6:off
syslog 0:off 1:off 2:on 3:on 4:on 5:on 6:off
netplugd 0:off 1:off 2:off 3:off 4:off 5:off 6:off
portmap 0:off 1:off 2:off 3:off 4:on 5:on 6:off
isdn 0:off 1:off 2:on 3:off 4:on 5:on 6:off
microcode_ctl 0:off 1:off 2:on 3:on 4:on 5:on 6:off
ypbind 0:off 1:off 2:off 3:off 4:off 5:off 6:off
kudzu 0:off 1:off 2:off 3:on 4:on 5:on 6:off
iptables 0:off 1:off 2:off 3:off 4:off 5:off 6:off
postfix 0:off 1:off 2:on 3:on 4:on 5:on 6:off
bluetooth 0:off 1:off 2:off 3:off 4:off 5:off 6:off
sysstat 0:off 1:on 2:on 3:on 4:on 5:on 6:off
diskdump 0:off 1:off 2:off 3:off 4:off 5:off 6:off
winbind 0:off 1:off 2:off 3:off 4:off 5:off 6:off
dovecot 0:off 1:off 2:on 3:on 4:on 5:on 6:off
named 0:off 1:off 2:off 3:off 4:off 5:off 6:off
nfs 0:off 1:off 2:off 3:off 4:off 5:off 6:off
mysqld 0:off 1:off 2:off 3:on 4:off 5:off 6:off
sshd 0:off 1:off 2:on 3:on 4:on 5:on 6:off
auditd 0:off 1:off 2:off 3:off 4:off 5:off 6:off
vsftpd 0:off 1:off 2:off 3:off 4:off 5:off 6:off
openibd 0:off 1:off 2:on 3:off 4:on 5:on 6:off
irda 0:off 1:off 2:off 3:off 4:off 5:off 6:off
monit 0:off 1:off 2:on 3:on 4:on 5:on 6:off
dc_client 0:off 1:off 2:off 3:off 4:off 5:off 6:off
readahead_early 0:off 1:off 2:off 3:off 4:off 5:on 6:off
netfs 0:off 1:off 2:off 3:on 4:on 5:on 6:off
squid 0:off 1:off 2:off 3:off 4:off 5:off 6:off
vmware 0:off 1:off 2:on 3:on 4:off 5:on 6:off
haldaemon 0:off 1:off 2:off 3:on 4:on 5:on 6:off
httpd 0:off 1:off 2:off 3:off 4:off 5:off 6:off
netdump 0:off 1:off 2:off 3:off 4:off 5:off 6:off
irqbalance 0:off 1:off 2:off 3:on 4:on 5:on 6:off
smartd 0:off 1:off 2:on 3:on 4:on 5:on 6:off
snmpd 0:off 1:off 2:on 3:on 4:on 5:on 6:off
anacron 0:off 1:off 2:on 3:on 4:on 5:on 6:off
arptables_jf 0:off 1:off 2:on 3:on 4:on 5:on 6:off
nfslock 0:off 1:off 2:off 3:off 4:on 5:on 6:off
dc_server 0:off 1:off 2:off 3:off 4:off 5:off 6:off
crond 0:off 1:off 2:on 3:on 4:on 5:on 6:off
psacct 0:off 1:off 2:on 3:on 4:on 5:on 6:off
mdmpd 0:off 1:off 2:off 3:off 4:off 5:off 6:off
tux 0:off 1:off 2:off 3:off 4:off 5:off 6:off
atd 0:off 1:off 2:off 3:on 4:on 5:on 6:off
acpid 0:off 1:off 2:off 3:on 4:on 5:on 6:off
spamassassin 0:off 1:off 2:on 3:on 4:on 5:on 6:off
pcmcia 0:off 1:off 2:on 3:off 4:on 5:on 6:off
rpcgssd 0:off 1:off 2:off 3:off 4:on 5:on 6:off
mdmonitor 0:off 1:off 2:on 3:on 4:on 5:on 6:off
xinetd based services:
cups-lpd: off
finger: off
eklogin: off
klogin: off
chargen: off
daytime-udp: off
krb5-telnet: off
time-udp: off
daytime: off
time: off
gssftp: off
kshell: off
echo-udp: off
rsync: off
tftp: off
vmware-authd: on
chargen-udp: off
echo: offType ntsysv for GUI tool
Code:
ntsysvType serviceconf - GUI tools need X GUI system
Code:
serviceconfShare
Share this post on Digg
Del.icio.us
Technorati
Enabling and disabling services during start up in GNU/Linux
In any Linux distribution, some services are enabled to start at boot up by default. For example, on my machine, I have pcmcia, cron daemon, postfix mail transport agent ... just to name a few, which start during boot up. Usually, it is prudent to disable all services that are not needed as they are potential security risks and also they unnecessarily waste hardware resources. For example, my machine does not have any pcmcia cards so I can safely disable it. Same is the case with postfix which is also not used.
So how do you disable these services so that they are not started at boot time?
The answer to that depends on the type of Linux distribution you are using. True, many Linux distributions including Ubuntu bundle with them a GUI front end to accomplish the task which makes it easier to enable and disable the system services. But there is no standard GUI utility common across all Linux distributions. And this makes it worth while to learn how to enable and disable the services via the command line.
But one thing is common for all Linux distributions which is that all the start-up scripts are stored in the '/etc/init.d/' directory. So if you want to say, enable apache webserver in different run levels, then you should have a script related to the apache webserver in the /etc/init.d/ directory. It is usually created at the time of installing the software. And in my machine (which runs Ubuntu), it is named apache2. Where as in Red Hat, it is named httpd. Usually, the script will have the same name as the process or daemon.
Here I will explain different ways of enabling and disabling the system services.
1) Red Hat Method
Red Hat and Red Hat based Linux distributions make use of the script called chkconfig to enable and disable the system services running in Linux.
For example, to enable the apache webserver to start in certain run levels, you use the chkconfig script to enable it in the desired run levels as follows:
# chkconfig httpd --add# chkconfig httpd on --level 2,3,5This will enable the apache webserver to automatically start in the run levels 2, 3 and 5. You can check this by running the command:
# chkconfig --list httpdOne can also disable the service by using the off flag as shown below:
# chkconfig httpd off# chkconfig httpd --delRed Hat also has a useful script called service which can be used to start or stop any service. Taking the previous example, to start apache webserver, you execute the command:
# service httpd startand to stop the service...
# service httpd stopThe options being start, stop and restart which are self explanatory.
2) Debian Method
Debian Linux has its own script to enable and disable services across runlevels. It is called update-rc.d. Going by the above example, you can enable apache webserver as follows:
# update-rc.d apache2 defaults... this will enable the apache webserver to start in the default run levels of 2,3,4 and 5. Of course, you can do it explicitly by giving the run levels instead of the "defaults" keyword as follows:
# update-rc.d apache2 start 20 2 3 4 5 . stop 80 0 1 6 .The above command modifies the sym-links in the respective /etc/rcX.d directories to start or stop the service in the destined runlevels. Here X stands for a value of 0 to 6 depending on the runlevel. One thing to note here is the dot (.) which is used to terminate the set which is important. Also 20 and 80 are the sequence codes which decides in what order of precedence the scripts in the /etc/init.d/ directory should be started or stopped.
And to disable the service in all the run levels, you execute the command:
# update-rc.d -f apache2 removeHere -f option which stands for force is mandatory.
But if you want to enable the service only in runlevel 5, you do this instead:
# update-rc.d apache2 start 20 5 . stop 80 0 1 2 3 4 6 .3) Gentoo Method
Gentoo also uses a script to enable or disable services during boot-up. The name of the script is rc-update . Gentoo has three default runlevels. Them being: boot, default and nonetwork. Suppose I want to add the apache webserver to start in the default runlevel, then I run the command:
# rc-update add apache2 default... and to remove the webserver, it is as simple as :
# rc-update del apache2To see all the running applications at your runlevel and their status, similar to what is achieved by chkconfig --list, you use the rc-status command.
# rc-status --all4) The old fashioned way
I remember the first time I started using Linux, there were no such scripts to aid the user in enabling or disabling the services during start-up. You did it the old fashioned way which was creating or deleting symbolic links in the respective /etc/rcX.d/ directories. Here X in rcX.d is a number which stands for the runlevel. There can be two kinds of symbolic links in the /etc/rcX.d/ directories. One starts with the character 'S' followed by a number between 0 and 99 to denote the priority, followed by the name of the service you want to enable. The second kind of symlink has a name which starts with a 'K' followed by a number and then the name of the service you want to disable. So in any runlevel, at any given time, for each service, there should be only one symlink of the 'S' or 'K' variety but not both.
So taking the above example, suppose I want to enable apache webserver in the runlevel 5 but want to disable it in all other runlevels, I do the following:
First to enable the service for run level 5, I move into /etc/rc5.d/ directory and create a symlink to the apache service script residing in the /etc/init.d/ directory as follows:
# cd /etc/rc5.d/# ln -s /etc/init.d/apache2 S20apache2This creates a symbolic link in the /etc/rc5.d/ directory which the system interprets as - start (S) the apache service before all the services which have a priority number greater than 20.
If you do a long listing of the directory /etc/rc5.d in your system, you can find a lot of symlinks similar to the one below.
lrwxrwxrwx 1 root root 17 Mar 31 13:02 S20apache2 -> ../init.d/apache2Now if I start a service, I will want to stop the service while rebooting or while moving to single user mode and so on. So in those run levels I have to create the symlinks starting with character 'K'. So going back to the apache2 service example, if I want to automatically stop the service when the system goes into runlevel 0, 1 or 6, I will have to create the symlinks as follows in the /etc/rc0.d, /etc/rc1.d/, /etc/rc6.d/ directories.
# ln -s /etc/init.d/apache2 K80apache2One interesting aspect here is the priority. Lower the number, the higher is the priority. So since the starting priority of apache2 is 20 - that is apache starts way ahead of other services during startup, we give it a stopping priority of 80. There is no hard and fast rule for this but usually, you follow the formula as follows:
If you have 'N' as the priority number for starting a service, you use the number (100-N) for the stopping priority number and vice versa.
Basic premise:
/etc/inittab is a configuration file which describes which processes are started at bootup
The important config for startup programs launched is the run level: # The default runlevel is defined here
id:3:initdefault:.d/
Here Runlevel 3 is configured.
This means that services which Runlevel 3 is defined will be launched on startup.
All services that are enabled to run at startup for this level can be found in /etc/init.d/rc3.d Similarly, for other levels: rc0.d:
S20halt
rc1.d:
K02single K09splash K10fbset K21coldplug S01coldplug S12fbset S13kbd S13splash S20single
rc2.d:
K02gpm K07cups K10rpmconfigcheck K14splash_early K16syslog S01stqdaemon S07snmpd S09hprsm S13splash S17ivr
K04plweb K08hwscan K10running-kernel K15fazzt K17network S05network S07weblogic S12fbset S14hwscan S17splash_late
K05ivr K08xntpd K13cmanic K15informix K21coldplug S06syslog S08hpasm S12raw S14xntpd S18plweb
K05splash_late K09splash K13hprsm K15mms K21random S07fazzt S08resmgr S12rpmconfigcheck S15cups S20gpm
K06atd K10fbset K14hpasm K15snmpd S01coldplug S07informix S08splash_early S12running-kernel S16atd
K06cron K10raw K14resmgr K15weblogic S01random S07mms S09cmanic S13kbd S16cron
rc3.d:
K02gpm K06smb K09xinetd K12nfsboot K15informix S01random S08hpasm S12autofs S13splash S16cron
K04plweb K06squid K10autofs K13cmanic K15mms S01stqdaemon S08portmap S12fbset S13xinetd S16dhcpd
K05ivr K07cups K10fbset K13hprsm K15nmb S05network S08resmgr S12named S14hwscan S16hpsmhd
K05smbfs K07postfix K10named K13hpvca K15snmpd S06syslog S08splash_early S12orbacus S14nfsserver S16smb
K05splash_late K07rsyncd K10orbacus K13nfslock K15weblogic S07fazzt S09cmanic S12raw S14xntpd S16squid
K06atd K08hwscan K10raw K14hpasm K16syslog S07informix S09hprsm S12rpmconfigcheck S15cups S17ivr
K06autoyast K08nfsserver K10rpmconfigcheck K14portmap K17network S07mms S09hpvca S12running-kernel S15postfix S17smbfs
K06cron K08xntpd K10running-kernel K14resmgr K21coldplug S07nmb S09nfslock S12sshd S15rsyncd S17splash_late
K06dhcpd K09ct_intel K10sshd K14splash_early K21random S07snmpd S10nfs S13ct_intel S16atd S18plweb
K06hpsmhd K09splash K12nfs K15fazzt S01coldplug S07weblogic S10nfsboot S13kbd S16autoyast S20gpm
rc4.d:
K06hpsmhd K13cmanic K13hprsm K13hpvca K14hpasm S08hpasm S09cmanic S09hprsm S09hpvca S16hpsmhd
rc5.d:
K04plweb K06squid K09xinetd K12nfsboot K15informix S01random S08hpasm S12autofs S13splash S16autoyast
K05ivr K07cups K10autofs K13cmanic K15mms S01stqdaemon S08portmap S12fbset S13xinetd S16cron
K05smbfs K07postfix K10fbset K13hprsm K15nmb S05network S08resmgr S12named S14hwscan S16dhcpd
K05splash_late K07rsyncd K10named K13hpvca K15snmpd S06syslog S08splash_early S12orbacus S14nfsserver S16hpsmhd
K06atd K07xdm K10orbacus K13nfslock K15weblogic S07fazzt S09cmanic S12raw S14xntpd S16smb
K06autoyast K08hwscan K10raw K14hpasm K16syslog S07informix S09hprsm S12rpmconfigcheck S15cups S16squid
K06cron K08nfsserver K10rpmconfigcheck K14portmap K17network S07mms S09hpvca S12running-kernel S15postfix S17ivr
K06dhcpd K08xntpd K10running-kernel K14resmgr K21coldplug S07nmb S09nfslock S12sshd S15rsyncd S17smbfs
K06hpsmhd K09ct_intel K10sshd K14splash_early K21random S07snmpd S10nfs S13ct_intel S15xdm S17splash_late
K06smb K09splash K12nfs K15fazzt S01coldplug S07weblogic S10nfsboot S13kbd S16atd S18plweb
rc6.d:
S20reboot
rcS.d:
S10boot.clock S13kbd S13splash S20single
All files that start with the letter K are kill services (they call the service script with stop as an argument)
All files that start with the letter S are start services (they call the service script with start as an argument)
All Kill scripts are run first then all the Start scripts.
Both the Kill and Start scripts are run in numerical order (ie. S01... is run before S02...)
In the Runlevel 3 directory /etc/init.d/rc3.d you'll notice that all the services listed are symbolic links to a script in the /etc/init.d dir: lrwxrwxrwx 1 root root 11 2006-11-09 10:48 S07weblogic -> ../weblogic
lrwxrwxrwx 1 root root 8 2006-11-09 10:48 S07snmpd -> ../snmpd
lrwxrwxrwx 1 root root 6 2006-11-09 10:48 S07nmb -> ../nmb
lrwxrwxrwx 1 root root 6 2006-11-09 10:48 S07mms -> ../mms
lrwxrwxrwx 1 root root 11 2006-11-09 10:48 S07informix -> ../informix
lrwxrwxrwx 1 root root 8 2006-11-09 10:48 S07fazzt -> ../fazzt
Let's take a closer look at one of these services scheduled to launch on startup S07weblogic -> ../weblogic
The chkconfig command allows you to manage services for startup.
To check the configuration of a service script found in /etc/init.d run the following command: chkconfig --list weblogic
weblogic 0:off 1:off 2:on 3:on 4:off 5:on 6:off
This means the weblogic service is enabled for Runlevel 2,3, and 5 (ie. found in rc2.d, rc3.d and rc5.d directories
The weblogic script starts weblogic up at boot time when the system starts up under the above runlevels
The script looks like the following: #!/bin/sh
#
# weblogic start and shutdown
#
# Copyright (c) Shoppers Drug Mart 2005
#
# Bootup and shutdown script
#
# /etc/init.d/weblogic
#
### BEGIN INIT INFO
# Provides: weblogic
# Required-Start: $network $nfs $informix
# Required-Stop:
# Default-Start: 2 3 5
# Default-Stop:
# Description: Start weblogic server
### END INIT INFO
trap "exit 255" 1 2 3 # ignore signals
ADMIN_HOME=/apps/appserver/prod/asAdmin
case $1 in
'start')
echo "Starting weblogic..."
#
# have the system run out of /appserver/prod/asAdmin/
#
# start weblogic as asuser
#
su asuser -c "cd ${ADMIN_HOME}/utils; ./startServer.ksh ALL >${ADMIN_HOME}/logs/boot.log 2>&1" &
;;
'stop')
echo "Stopping weblogic..."
su asuser -c "cd ${ADMIN_HOME}/utils; ./stopServer.ksh ALL >${ADMIN_HOME}/logs/stop.log 2>&1"
;;
*)
echo "Usage: $0 {start|stop}"
;;
esac
anything you put in /etc/rc.d starting with rc. is run at startup. The file has to be executable also. Here is the content of script that was installed by default in my /etc/rc.d/rc.httpd
#!/bin/sh
#
# /etc/rc.d/rc.httpd
#
# Start/stop/restart the Apache web server.
#
# To make Apache start automatically at boot, make this
# file executable: chmod 755 /etc/rc.d/rc.httpd
#
case "$1" in
'start')
/usr/sbin/apachectl start ;;
'stop')
/usr/sbin/apachectl stop ;;
'restart')
/usr/sbin/apachectl restart ;;
*)
echo "usage $0 start|stop|restart" ;;
esac
As you can see, it is very alike but with a little more options. (restart is very useful).
NAME
chkconfig - updates and queries runlevel information for system services
SYNOPSIS
chkconfig --list [name]
chkconfig --add name
chkconfig --del name
chkconfig [--level levels] name
chkconfig [--level levels] name
DESCRIPTION
chkconfig provides a simple command-line tool for maintaining the /etc/rc[0-6].d directory hierarchy by relieving system administrators of the task of directly manipulating the numerous symbolic links in those directories.
This implementation of chkconfig was inspired by the chkconfig command present in the IRIX operating system. Rather than maintaining configuration information outside of the /etc/rc[0-6].d hierarchy, however, this version directly manages the symlinks in /etc/rc[0-6].d. This leaves all of the configuration information regarding what services init starts in a single location.
chkconfig has five distinct functions: adding new services for management, removing services from management, listing the current startup information for services, changing the startup information for services, and checking the startup state of a particular service.
When chkconfig is run without any options, it displays usage information. If only a service name is given, it checks to see if the service is configured to be started in the current runlevel. If it is, chkconfig returns true; otherwise it returns false. The --level option may be used to have chkconfig query an alternative runlevel rather than the current one.
If one of on, off, or reset is specified after the service name, chkconfig changes the startup information for the specified service. The on and off flags cause the service to be started or stopped, respectively, in the runlevels being changed. The reset flag resets the startup information for the service to whatever is specified in the init script in question.
By default, the on and off options affect only runlevels 2, 3, 4, and 5, while reset affects all of the runlevels. The --level option may be used to specify which runlevels are affected.
Note that for every service, each runlevel has either a start script or a stop script. When switching runlevels, init will not re-start an already-started service, and will not re-stop a service that is not running.
OPTIONS
--level levels
Specifies the run levels an operation should pertain to. It is given as a string of numbers from 0 to 7. For example, --level 35 specifies runlevels 3 and 5.
--add name
This option adds a new service for management by chkconfig. When a new service is added, chkconfig ensures that the service has either a start or a kill entry in every runlevel. If any runlevel is missing such an entry, chkconfig creates the appropriate entry as specified by the default values in the init script. Note that default entries in LSB-delimited 'INIT INFO' sections take precedence over the default runlevels in the initscript.
--del name
The service is removed from chkconfig management, and any symbolic links in /etc/rc[0-6].d which pertain to it are removed.
--list name
This option lists all of the services which chkconfig knows about, and whether they are stopped or started in each runlevel. If name is specified, information in only display about service name.
RUNLEVEL FILES
Each service which should be manageable by chkconfig needs two or more commented lines added to its init.d script. The first line tells chkconfig what runlevels the service should be started in by default, as well as the start and stop priority levels. If the service should not, by default, be started in any runlevels, a - should be used in place of the runlevels list. The second line contains a description for the service, and may be extended across multiple lines with backslash continuation.
For example, random.init has these three lines:
# chkconfig: 2345 20 80
# description: Saves and restores system entropy pool for \
# higher quality random number generation.
This says that the random script should be started in levels 2, 3, 4, and 5, that its start priority should be 20, and that its stop priority should be 80. You should be able to figure out what the description says; the \ causes the line to be continued. The extra space in front of the line is ignored.
Tuesday, September 13, 2011
What are XA transactions? What is a XA datasource?
An XA transaction, in the most general terms, is a "global transaction" that may span multiple resources. A non-XA transaction always involves just one resource. An XA transaction involves a coordinating transaction manager, with one or more databases (or other resources, like JMS) all involved in a single global transaction. Non-XA transactions have no transaction coordinator, and a single resource is doing all its transaction work itself (this is sometimes called local transactions).
XA transactions come from the X/Open group specification on distributed, global transactions. JTA includes the X/Open XA spec, in modified form. Most stuff in the world is non-XA - a Servlet or EJB or plain old JDBC in a Java application talking to a single database. XA gets involved when you want to work with multiple resources - 2 or more databases, a database and a JMS connection, all of those plus maybe a JCA resource - all in a single transaction. In this scenario, you'll have an app server like Websphere or Weblogic or JBoss acting as the Transaction Manager, and your various resources (Oracle, Sybase, IBM MQ JMS, SAP, whatever) acting as transaction resources. Your code can then update/delete/publish/whatever across the many resources. When you say "commit", the results are commited across all of the resources. When you say "rollback", _everything_ is rolled back across all resources.
The Transaction Manager coordinates all of this through a protocol called Two Phase Commit (2PC). This protocol also has to be supported by the individual resources. In terms of datasources, an XA datasource is a data source that can participate in an XA global transaction. A non-XA datasource generally can't participate in a global transaction (sort of - some people implement what's called a "last participant" optimization that can let you do this for exactly one non-XA item).
Most developers have at least heard of XA, which describes the standard protocol that allows coordination, commitment, and recovery between transaction managers and resource managers.
Products such as CICS, Tuxedo, and even BEA WebLogic Server act as transaction managers, coordinating transactions across different resource managers. Typical XA resources are databases, messaging queuing products such as JMS or WebSphere MQ, mainframe applications, ERP packages, or anything else that can be coordinated with the transaction manager. XA is used to coordinate what is commonly called a two-phase commit (2PC) transaction. The classic example of a 2PC transaction is when two different databases need to be updated atomically. Most people think of something like a bank that has one database for savings accounts and a different one for checking accounts. If a customer wants to transfer money between his checking and savings accounts, both databases have to participate in the transaction or the bank risks losing track of some money.
The problem is that most developers think, "Well, my application uses only one database, so I don't need to use XA on that database." This may not be true. The question that should be asked is, "Does the application require shared access to multiple resources that need to ensure the integrity of the transaction being performed?" For instance, does the application use Java 2 Connector Architecture adapters, the BEA WebLogic Server Messaging Bridge, or the Java Message Service (JMS)? If the application needs to update the database and any of these other resources in the same transaction, then both the database and the other resource need to be treated as XA resources.
In addition to Web or EJB applications that may touch different resources, XA is often needed when building Web services or BEA WebLogic Integration applications. Integration applications often span disparate resources and involve asynchronous interfaces. As a result, they frequently require 2PC. An extremely common use case for WebLogic Integration that calls for XA is to pull a message from WebSphere MQ, do some business processing with the message, make updates to a database, and then place another message back on MQ. Usually this whole process has to occur in a guaranteed and transactional manner. There is a tendency to shy away from XA because of the performance penalty it imposes. Still, if transaction coordination across multiple resources is needed, there is no way to avoid XA. If the requirements for an application include phrases such as "persistent messaging with guaranteed once and only once message delivery," then XA is probably needed.
Figure 1 shows a common, though extremely simplified, BEA WebLogic Integration process definition that needs to use XA. A JMS message is received to start the process. Assume the message is a customer order. The order then has to be placed in the order shipment database and placed on another message queue for further processing by a legacy billing application. Unless XA is used to coordinate the transaction between the database and JMS, we risk updating the shipment database without updating the billing application. This could result in the order being shipped, but the customer might never be billed.
Once you've determined that your application does in fact need to use XA, how do we make sure it is used correctly? Fortunately, J2EE and the Java Transaction API (JTA) hide the implementation details of XA. Coding changes are not required to enable XA for your application. Using XA properly is a matter of configuring the resources that need to be enrolled in the same transaction. Depending on the application, the BEA WebLogic Server resources that most often need to be configured for XA are connection pools, data sources, JMS Servers, JMS connection factories, and messaging bridges. Fortunately, the entire configuration needed on the WebLogic side can be done from the WebLogic Server Console.
Before worrying about the WebLogic configuration for XA, we have to ensure that the resources we want to access are XA enabled. Check with the database administrator, the WebSphere MQ administrator, or whoever is in charge of the resources that are outside WebLogic. These resources do not always enable XA by default, nor do all resources support the X/Open XA interface, which is required to truly do XA transactions. For example, some databases require that additional scripts be run in order to enable XA.
For those resources that do not support XA at all, some transaction managers allow for a "one-phase" optimization. In a one-phase optimization, the transaction manager issues a "prepare to commit" command to all of the XA resources. If all of the XA resources respond affirmatively, the transaction manager will commit the non-XA resource. The transaction manager will then commit all of the XA resources. This allows the transaction manager to work with a non-XA resource, but normally only one XA resource per transaction is allowed. There is a small chance that something will go wrong after committing the non-XA resource and before the XA resources all commit, but this is the best alternative if a resource just doesn't support XA.
Connection pools are where most people start configuring WebLogic for XA. The connection pool needs to use an XA driver. Most database vendors provide XA drivers for their databases. BEA WebLogic Server 8.1 SP2 ships with a number of XA drivers for Oracle, DB2, Informix, SQL Server, and Sybase. We need to ensure that the Driver classname on the connection pool page of the BEA WebLogic Console is in fact an XA driver. When using the configuration wizards in BEA WebLogic Server 8.1, the wizards always note which drivers are XA enabled.
When more than one XA driver is available for the database involved, be sure to run some benchmarks to determine which driver gives the best performance. Sometimes different drivers for the same database implement XA in completely different ways. This leads to wide variances in performance. For example, the Oracle 9.2 OCI Driver implements XA natively, while the Oracle 9.2 Thin Driver relies on stored procedures in the database to implement XA. As a result, the Oracle 9.2 OCI driver generally performs XA transactions much faster than the Thin driver. Oracle's newest Type 4 driver, the 10g Thin Driver, also implements XA natively and is backwards compatible with some previous versions of the Oracle database. Taking the time to fully evaluate alternative drivers can lead to significant performance improvements.
Thursday, July 14, 2011
Running WLST from Ant
WebLogic Server provides a custom Ant task, wlst, that invokes a WLST script from an Ant build file. You can create a WLST script (.py) file and then use this task to invoke the script file, or you can create a WLST script in a nested element within this task.
For more information about Ant, see Apache Ant 1.7.1 Manual.
The wlst task is predefined in the version of Ant that is installed with WebLogic Server. To add this version of Ant to your build environment, run the following script:
WL_HOME\server\bin\setWLSEnv.cmd (or setWLSEnv.sh on UNIX)
where WL_HOME is the directory in which you installed WebLogic Server.
If you want to use the wlst task with your own Ant installation, include the following task definition in your build file:
Parameters
Below are the wlst task parameters that you specify as attributes of the element.
properties="propsFile"
Name and location of a properties file that contains name-value pairs that you can reference in your WLST script.
For more information about Ant, see Apache Ant 1.7.1 Manual.
The wlst task is predefined in the version of Ant that is installed with WebLogic Server. To add this version of Ant to your build environment, run the following script:
WL_HOME\server\bin\setWLSEnv.cmd (or setWLSEnv.sh on UNIX)
where WL_HOME is the directory in which you installed WebLogic Server.
If you want to use the wlst task with your own Ant installation, include the following task definition in your build file:
Parameters
Below are the wlst task parameters that you specify as attributes of the
properties="propsFile"
Name and location of a properties file that contains name-value pairs that you can reference in your WLST script.
Wednesday, July 13, 2011
WLST Help
To display information about WLST commands and variables, enter the help command.
If you specify the help command without arguments, WLST summarizes the command categories. To display information about a particular command, variable, or command category, specify its name as an argument to the help command. To list a summary of all online or offline commands from the command line using the following commands, respectively:
help('online') help('offline')The help command will support a query; for example, help('get*') displays the syntax and usage information for all commands that begin with get.
For example, to display information about the disconnect command, enter the following command:
wls:/mydomain/serverConfig> help('disconnect')
The command returns the following:
Description:
Disconnect from a weblogic server instance.
Syntax:
disconnect()
Example:
wls:/mydomain/serverConfig> disconnect()
WLST Eg: Redirecting Error and Debug Output to a File
Redirecting Error and Debug Output to a File
To redirect WLST information, error, and debug messages from standard out to a file, enter:
redirect(outputFile,[toStdOut])
stopRedirect()
This command also redirects the output of the dumpStack() and dumpVariables() commands.
For example, to redirect WLST output to the logs/wlst.log file under the directory from which you started WLST, enter the following command:
wls:/mydomain/serverConfig> redirect('./logs/wlst.log')
Syntax for WLST Commands
Follow this syntax when entering WLST commands or writing them in a script:
■Command names and arguments are case sensitive.
■Enclose arguments in single or double quotes. For example, 'newServer' or "newServer".
■If you specify a backslash character (\) in a string, either precede the backslash with another backslash or precede the entire string with a lower-case r character. The \ or r prevents Jython from interpreting the backslash as a special character.
For example when specifying a file pathname that contains a backslash:
readTemplate('c:\\userdomains\\mytemplates\\mytemplate.jar') or
readTemplate(r'c:\userdomains\mytemplates\mytemplate.jar')
■When using WLST offline, the following characters are not valid in names of management objects: period (.), forward slash (/), or backward slash (\).
If you need to cd to a management object whose name includes a forward slash (/), surround the object name in parentheses. For example:
cd('JMSQueue/(jms/REGISTRATION_MDB_QUEUE)')
WLST Examples
Examples
To use WLST in script mode:
java weblogic.WLST c:\myscripts\myscript.py
To run a WLST script on a WebLogic Server instance that uses the SSL listen port and the demonstration certificates:
java -Dweblogic.security.SSL.ignoreHostnameVerification=true
-Dweblogic.security.TrustKeyStore=DemoTrust weblogic.WLST
c:\myscripts\myscript.py
To use WLST in interactive mode:
java weblogic.WLST
To connect to a WebLogic Server instance after you start WLST in interactive mode:
wls:/offline> connect('weblogic','weblogic','localhost:7001')
Exiting WLST
To exit WLST, enter the exit() command:
wls:/mydomain/serverConfig> exit()Exiting WebLogic Scripting Tool ...c:\>
WLST Interactive Mode, Script Mode, and Embedded Mode
Interactive Mode, Script Mode, and Embedded Mode
You can use any of the following techniques to invoke WLST commands:
■Interactively, on the command line—Interactive Mode
■In batches, supplied in a file—Script Mode
■Embedded in Java code—Embedded Mode
Interactive Mode
Interactive mode, in which you enter a command and view the response at a command-line prompt, is useful for learning the tool, prototyping command syntax, and verifying configuration options before building a script. Using WLST interactively is particularly useful for getting immediate feedback after making a critical configuration change. The WLST scripting shell maintains a persistent connection with an instance of WebLogic Server.
WLST can write all of the commands that you enter during a WLST session to a file. You can edit this file and run it as a WLST script. For more information, see startRecording and stopRecording.
Script Mode
Scripts invoke a sequence of WLST commands without requiring your input, much like a shell script. Scripts contain WLST commands in a text file with a .py file extension, for example, filename.py. You use script files with the Jython commands for running scripts.
Using WLST scripts, you can:
■Automate WebLogic Server configuration and application deployment
■Apply the same configuration settings, iteratively, across multiple nodes of a topology
■Take advantage of scripting language features, such as loops, flow control constructs, conditional statements, and variable evaluations that are limited in interactive mode
■Schedule scripts to run at various times
■Automate repetitive tasks and complex procedures
■Configure an application in a hands-free data center
For information about sample scripts that WebLogic Server installs, see WLST Sample Scripts.
Embedded Mode
In embedded mode, you instantiate the WLST interpreter in your Java code and use it to run WLST commands and scripts. All WLST commands and variables that you use in interactive and script mode can be run in embedded mode.
Listing 2-1 illustrates how to instantiate the WLST interpreter and use it to connect to a running server, create two servers, and assign them to clusters.
--------------------------------------------------------------------------------
WLST
This document describes the WebLogic Scripting Tool (WLST). It explains how you use the WLST command-line scripting interface to configure, manage, and persist changes to WebLogic Server instances and domains, and monitor and manage server runtime events.
The WebLogic Scripting Tool (WLST) is a command-line scripting environment that you can use to create, manage, and monitor WebLogic Server domains. It is based on the Java scripting interpreter, Jython. In addition to supporting standard Jython features such as local variables, conditional variables, and flow control statements, WLST provides a set of scripting functions (commands) that are specific to WebLogic Server. You can extend the WebLogic scripting language to suit your needs by following the Jython language syntax. See http://www.jython.org.
Using WLST Online or Offline
You can use WLST as the command-line equivalent to the WebLogic Server Administration Console (WLST online) or as the command-line equivalent to the Configuration Wizard (WLST offline). For information about the WebLogic
WLST Online Scripts
You can use WLST to connect to a running Administration Server and manage the configuration of an active domain, view performance data about resources in the domain, or manage security data (such as adding or removing users). You can also use WLST to connect to Managed Servers, but you cannot modify configuration data from Managed Servers.
WLST online is a Java Management Extensions (JMX) client. It interacts with a server’s in-memory collection of Managed Beans (MBeans), which are Java objects that provide a management interface for an underlying resource
The WLST online scripts helps to perform administrative tasks and initiate WebLogic Server configuration changes while connected to a running server. WLST online scripts are located in the following directory: SAMPLES_HOME\server\examples\src\examples\wlst\online, where SAMPLES_HOME refers to the main examples directory of your WebLogic Server installation, such as c:\beahome\wlserver_10.3\samples.
WLST Offline Scripts
The WLST offline scripts helps to create domains using the domain templates that are installed with the software. The WLST offline scripts are located in the following directory: WL_HOME\common\templates\scripts\wlst, where WL_HOME refers to the top-level installation directory for WebLogic Server
Without connecting to a running WebLogic Server instance, you can use WLST to create domain templates, create a new domain based on existing templates, or extend an existing, inactive domain. You cannot use WLST offline to view performance data about resources in a domain or modify security data (such as adding or removing users).
WLST offline provides read and write access to the configuration data that is persisted in the domain’s config directory or in a domain template JAR created using Template Builder
Note the following restrictions for modifying configuration data with WLST offline:
■Oracle recommends that you do not use WLST offline to manage the configuration of an active domain. Offline edits are ignored by running servers and can be overwritten by JMX clients such as WLST online or the WebLogic Server Administration Console.
■As a performance optimization, WebLogic Server does not store most of its default values in the domain’s configuration files. In some cases, this optimization prevents management objects from being displayed by WLST offline (because WebLogic Server has never written the corresponding XML elements to the domain’s configuration files). For example, if you never modify the default logging severity level for a domain while the domain is active, WLST offline will not display the domain’s Log management object.
If you want to change the default value of attributes whose management object is not displayed by WLST offline, you must first use the create command to create the management object. Then you can cd to the management object and change the attribute value
Wednesday, July 6, 2011
OBIEE Request Flow
The below diagram shows the basic architecture of OBIEE and its components:
Now, first of all lets understand the flow in which a request flows from Client to Data Source.
If a client runs a report, the request first goes to the Presentation Server and then it gets routed to the BI Server and then it gets further routed to the underlying Database or the data source.
Client -> Presentation Server -> BI Server -> Data source
Now, the request is routed back through the similar route to the client. Which means, the data is fetched from the Data source and it gets routed to Presentation server through BI server and then to the client.
Client <- Presentation Server <- BI Server <- Data Source
The above flows provide a very basic idea of how the data is fetched and showed in a report in OBIEE.
Now, lets understand it more properly by dividing the above diag. into segments and then :
1) Client and User Interface
2) Presentation Server & Presentation Catalog
3) BI Server & Admin Tool
4) Datasource
Client & User Interface: This level has the UI of OBIEE which is accessible to the clients and users. The OBIEE UI has several components like OBIEE Answers, Interactive Dashboards etc.
• Oracle BI Answers is a powerful, ad hoc query and analysis tool that works against a logical view of information from multiple data sources in a pure Web environment.
• Oracle BI Interactive Dashboards are interactive Web pages that display personalized, role-based information to guide users to precise and effective decisions.
• BI Delivers is an alerting engine which gives users flexibility to schedule their reports and get them delivered to their handheld devices or interactive dashboards or any other delivery profile and helps in making quick business decisions.
In simpler terms we can say that, this is a web application which is accessible to the users for preparing their reports/dashboards and do Ad-Hoc reporting to cater the business needs.
We have divided OBIEE Architecture in 4 segments to better understand it.
1) Client and User Interface
2) Presentation Server & Presentation Catalog
3) BI Server & Admin Tool
4) Datasource
We have covered the first segment in the previous post. So, lets understand the second segment.
Presentation Server & Presentation Catalog:
The BI Presentation server is basically a web server on which the OBIEE web application runs. It processes the client requests and routes it to the BI Server and vice versa. It can be deployed on any of the following IIS or Oc4j. It makes use of the Presentation catalog which contains the aspects of the application.
The Presentation catalog stores the application dashboards, reports, folders and filters. It also contains information regarding the permissions of dashboards & reports created by users. It is created when the Presentation server starts and can be administered using the tool called Catalog Manager.
In other words we can say that the Presentation server and the Presentation Catalog are together responsible for providing the clients with a web server on which the web application runs and also administers the look and feel of the User Interface.
BI SERVER AND ADMIN TOOL
BI Server is a highly scalable query and analysis server. It is the heart of the entire architecture. It efficiently integrates data from multiple relational, unstructured, OLAP application sources, both Oracle and non-Oracle.
It interacts with the Presentation server over TCP/IP and takes the reporting request from the presentation server. Then the BI server processes the request and form logical and physical queries(in case of database as data source) and this physical query is sent to the underlying data source from which the data is processed. The BI Server interacts with the underlying database using ODBC. Hence, the entire processing of request is done by the BI server.
In the above paragraph I have mentioned that the BI server creates a logical and physical query. But how will the BI server generate this query?? How will the BI Server know what all joins need to be used?? I guess all these questions must be coming to your mind. So, lets understand the underlying process..
The BI server makes use of the BI Repository for converting the user request into logical and physical queries. The BI Repository is the metadata using which the server gets the information of the joins and the filters to be used in the query. It is the backbone of the architecture.
Now, this is the place where all the modelling is done and the role of OBIEE developers come into picture . The BI Repository is created using the Administration Tool. The repository contains three layers: Physical, BMM and Presentation Layer.
Physical Layer: Contains the tables imported from the underlying DB with appropriate joins between them.
BMM Layer: This is the Business Model layer and hence all the Business logics are implemented on this layer eg: Calculation of %age Sales, Revenue etc.
Presentation Layer: As the names specifies this layer is used for Presentation of required tables and columns to the users. The columns pulled in this layer are directly visible to the users.
Where BI Server and Admin Tool come in picture???
Now, when the users log into the BI Answers i.e the user interface, they see all the columns that are pulled on the Presentation Layer in the Repository. They choose the desired columns from there and click results button to view the report. After that the request is sent to the BI Server through the Presentation server, the BI server makes use of the BI Repository to formulate a query out of the requested report based on the joins and tables specified in the repository. This query is sent to the underlying DB and hence results are fetched.
4th segment DataSources.
This is a rather simple one as we all know till now that OBIEE is a reporting tool and works on data from underlying Databases, so here DataSources are the underlying Databases with which the OBIEE server interacts. OBIEE is a very smart tool and it has got the capability of reporting on multiple Databases and also multiple types of Databases like XML, Oracle, SQL Server etc.
Now, in the previous posts you have seen what is an OBIEE Repository and what is the Physical Layer and what are connection pools. I am reminding you of these things because our current segment is based on this and we will see how.
Now, when we design the OBIEE Metadata or repository for reporting, we import the tables on which we need to perform reporting into the physical layer from the respective DBs. And then we apply appropriate joins between the tables and furthur pull them to BMM and then to Presentation Layer for reporting.
The question that comes out here is “How does the BI Server interacts with the underlying DBs for showing the reports???”
The answer to this question lies in the Connection Pools. If we open the Connection Pool we can see that we need to select the Call Interface, give the name of the DSN, give a Username and password. These things help up to connect to the Database.
Call Interface – There is a drop down from where we can select the appropriate Call Interface. Some examples are ODBC, OCI etc. Both ODBC and OCI can be used for Oracle. The main difference between using them is, In ODBC we need to create a DSN in the system where the server is installed but OCI is a native DSN and we can use it directly without creating the DSN in the system.
DSN- This is the name of the DSN which OBIEE uses to connect to the underlying DB.
Username- The user with which OBIEE connects the DB. Generally the user used for reporting should only have the read priviledges on the DB.
Password- Password of the user with which OBIEE connects to the DB.
Now, when a user runs the report in Answers the OBIEE server accesses the DB using the connection pool with the specified Call Interface and username and returns the data.
The next question is “How does the BI server takes care of a report formed using columns and tables from multiple DBs???”
As I have told you earlier also that BI server is very intellegent and is built in such a way that it can process request formed form multiple DBs. When the user generates a report involving multiple DBs, the request navigates to the Navigator section in the BI Server which checks the underlying DBs with which OBIEE needs to interact to. Then the BI server generates separate queries for the DBs and fire them on the respective DBs. Then it fetches the data from the underlying DBs and combines the result set in its own memory and displays the result in the report.
With this post we have covered the 4 segments of the OBIEE Architecture. I hope this will help you alot in understanding the BI Architecture and also in understanding the OBIEE behaviour. In the upcoming posts I will also try to go into the details and throw some more light on the BI Server components.
Subscribe to:
Posts (Atom)